
 USE CASES
Sarah is a registered nutritionist. She has spent three years writing meal plans for individual clients and she is done with the one-to-one grind. She wants to package her eight-week programme — weekly meal plans, grocery lists, prep guides and coaching videos — into something she sells once and delivers automatically.
She does not want to pay for a membership plugin. She does not want to learn an LMS. She wants her WordPress site to hand over Week 2 when it is time for Week 2, and not a minute before. Here is exactly how she would build it.
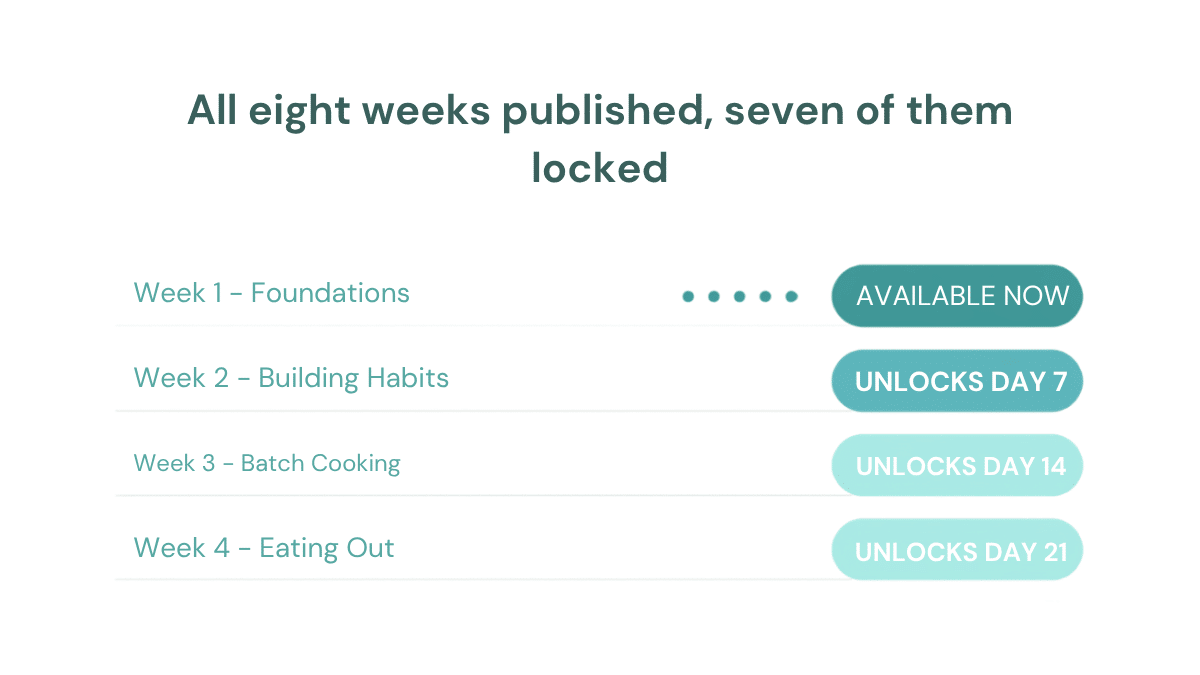
Each week is one WordPress page. Sarah has eight:
All eight are published from day one. Only Week 1 is visible. Weeks 2 to 8 are locked, and each opens on its own schedule without Sarah touching anything after setup.
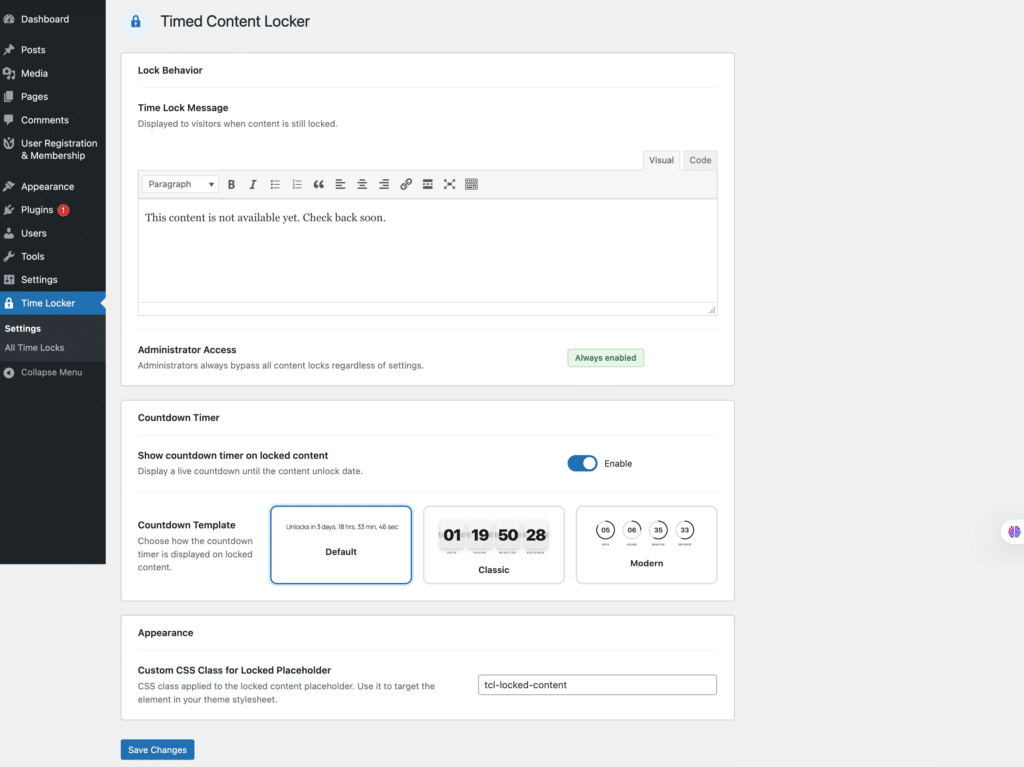
Sarah installs Timed Content Locker and starts in Tools → Timed Content Locker → Global Settings. She writes the message every locked week will show: “This week isn’t ready for you yet — the programme is designed to build week by week. Week 3 opens for you on the 14th.” She turns the countdown timer on so clients can see exactly how long is left, and picks the quiet Default template, because a flip-digit clock on a meal plan feels like a sales page.
She also checks Settings → General for the site timezone. Everything else in the build counts from it.
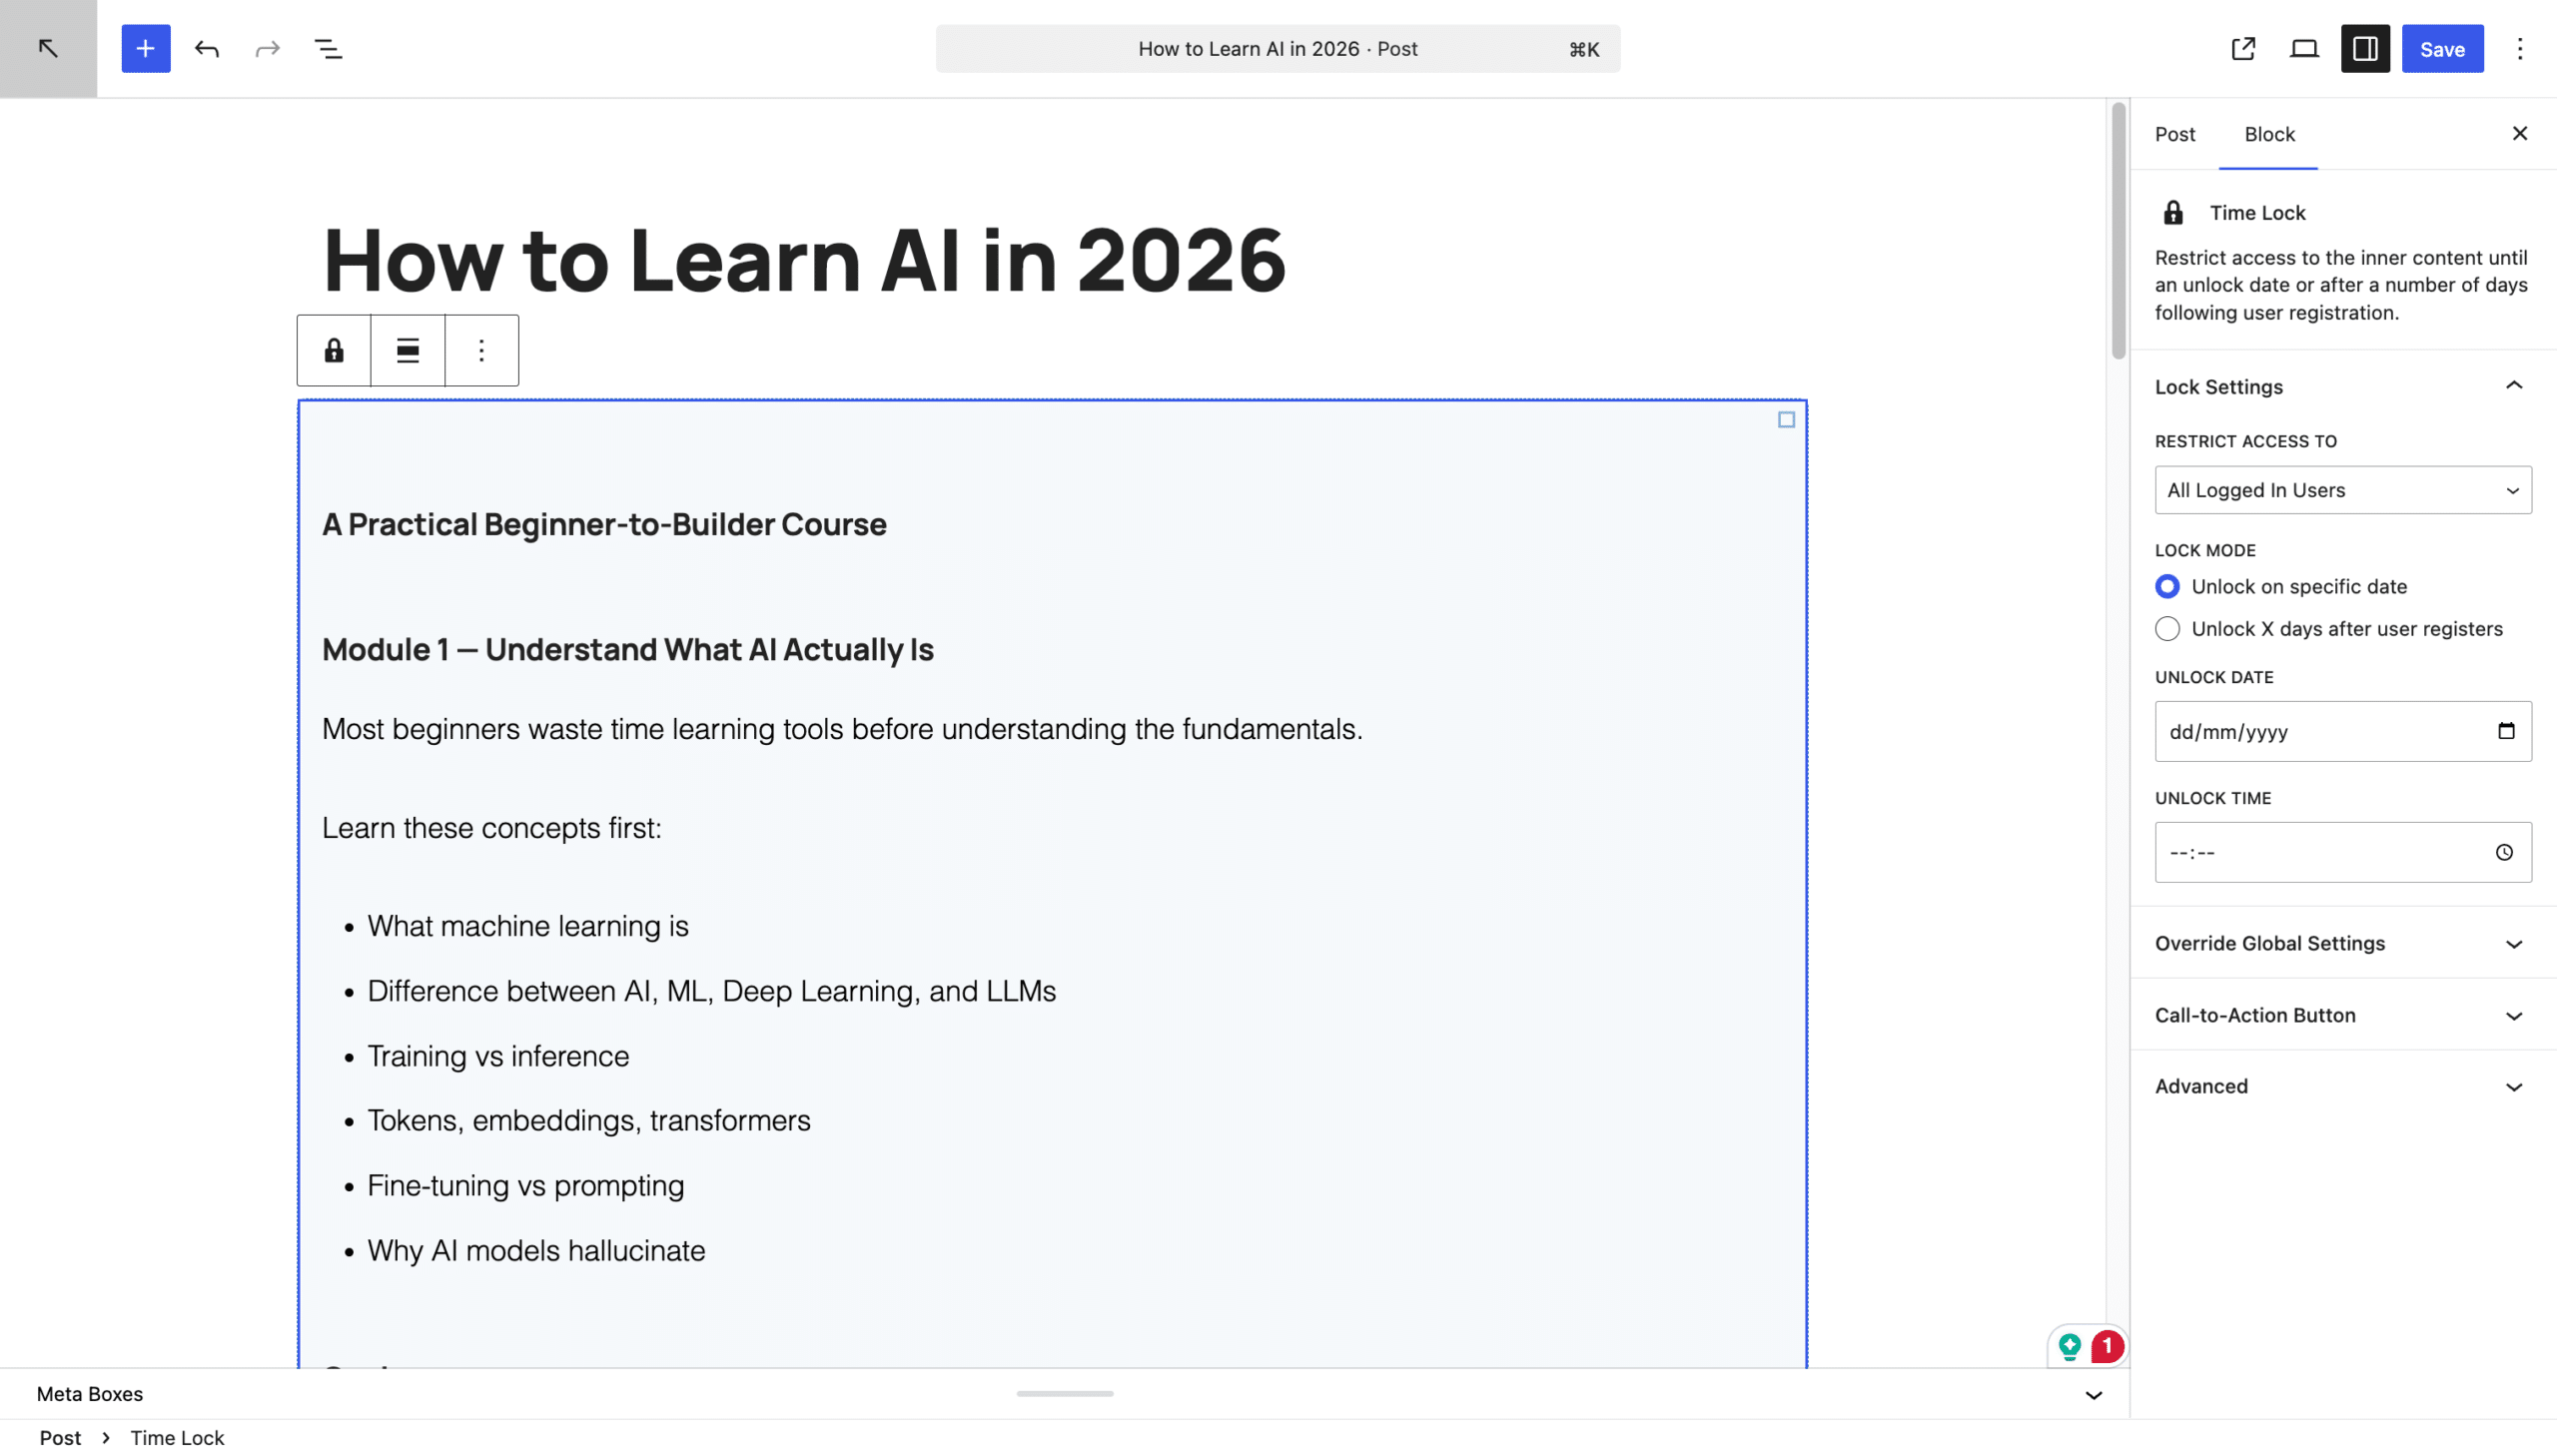
Sarah’s programme is evergreen: clients buy year-round rather than in cohorts. So she uses the days after registration mode rather than fixed calendar dates. Each page opens a set number of days after that client’s own account was created:
A client who joins in March gets exactly the same paced experience as one who joined in January. If Sarah ever runs a live cohort instead, she switches the same pages to fixed dates and everyone moves together.
A client who opens Week 3 on day 9 sees Sarah’s message and a countdown: “Week 3 opens in 5 days, 3 hours.” Below it, Sarah has added a call-to-action button linking to the Week 2 bonus recipe she released as a standalone post. The locked page is not a dead end — it is a redirect to something useful.
On day 14 the countdown reaches zero. The client refreshes and Week 3 is there, in full, with no action required from Sarah.

The registration-relative mode counts from the WordPress user registration date, so every paying client needs a WordPress account on Sarah’s site. How that account gets created is entirely up to her:
The plugin does not care which route was used — it only reads the registration timestamp. That separation is the point: Sarah can change payment providers next year without touching a single unlock rule.
Sarah restricts the weekly pages to Logged In Users, so guests see the locked screen everywhere. Rather than waste it, she writes a guest-specific message on Week 1: a short description of what the week contains and a button to buy. The locked page becomes the top of her funnel.
Nothing breaks. Once a week has opened for that client it stays open, so a client who disappears for a month comes back to everything up to their current day.
Adjusting an individual is not what the registration-relative mode is for — it applies the same offsets to everyone. For a one-off, the simplest route is to send that client the content directly.
No. The plugin has no e-commerce dependency at all — see gating content by date without WooCommerce. Use WooCommerce only if you want it for the checkout itself.
For a single evergreen programme, usually yes — you are paying for date logic rather than for membership levels, subscription billing and access rules you will never configure. This comparison goes through the trade-offs.
Eight pages, eight numbers, one plugin, and no ongoing work once it is running. If you want the general version of this build rather than the meal-plan one, start with the step-by-step drip course guide.
Install Timed Content Locker and have your first weekly drip running before the end of today.