
 TUTORIALS
A locked screen that just says “come back later” wastes the moment. A locked screen with a live countdown — days, hours, minutes and seconds ticking down — turns a dead end into an event. Students don’t just learn that the content is unavailable. They learn exactly when it opens, down to the second.
This guide covers everything the countdown in Timed Content Locker can do: how it works under the hood, how to switch it on globally or for one post, how to choose between the three display templates, and how to write the message and call-to-action that sit around it.
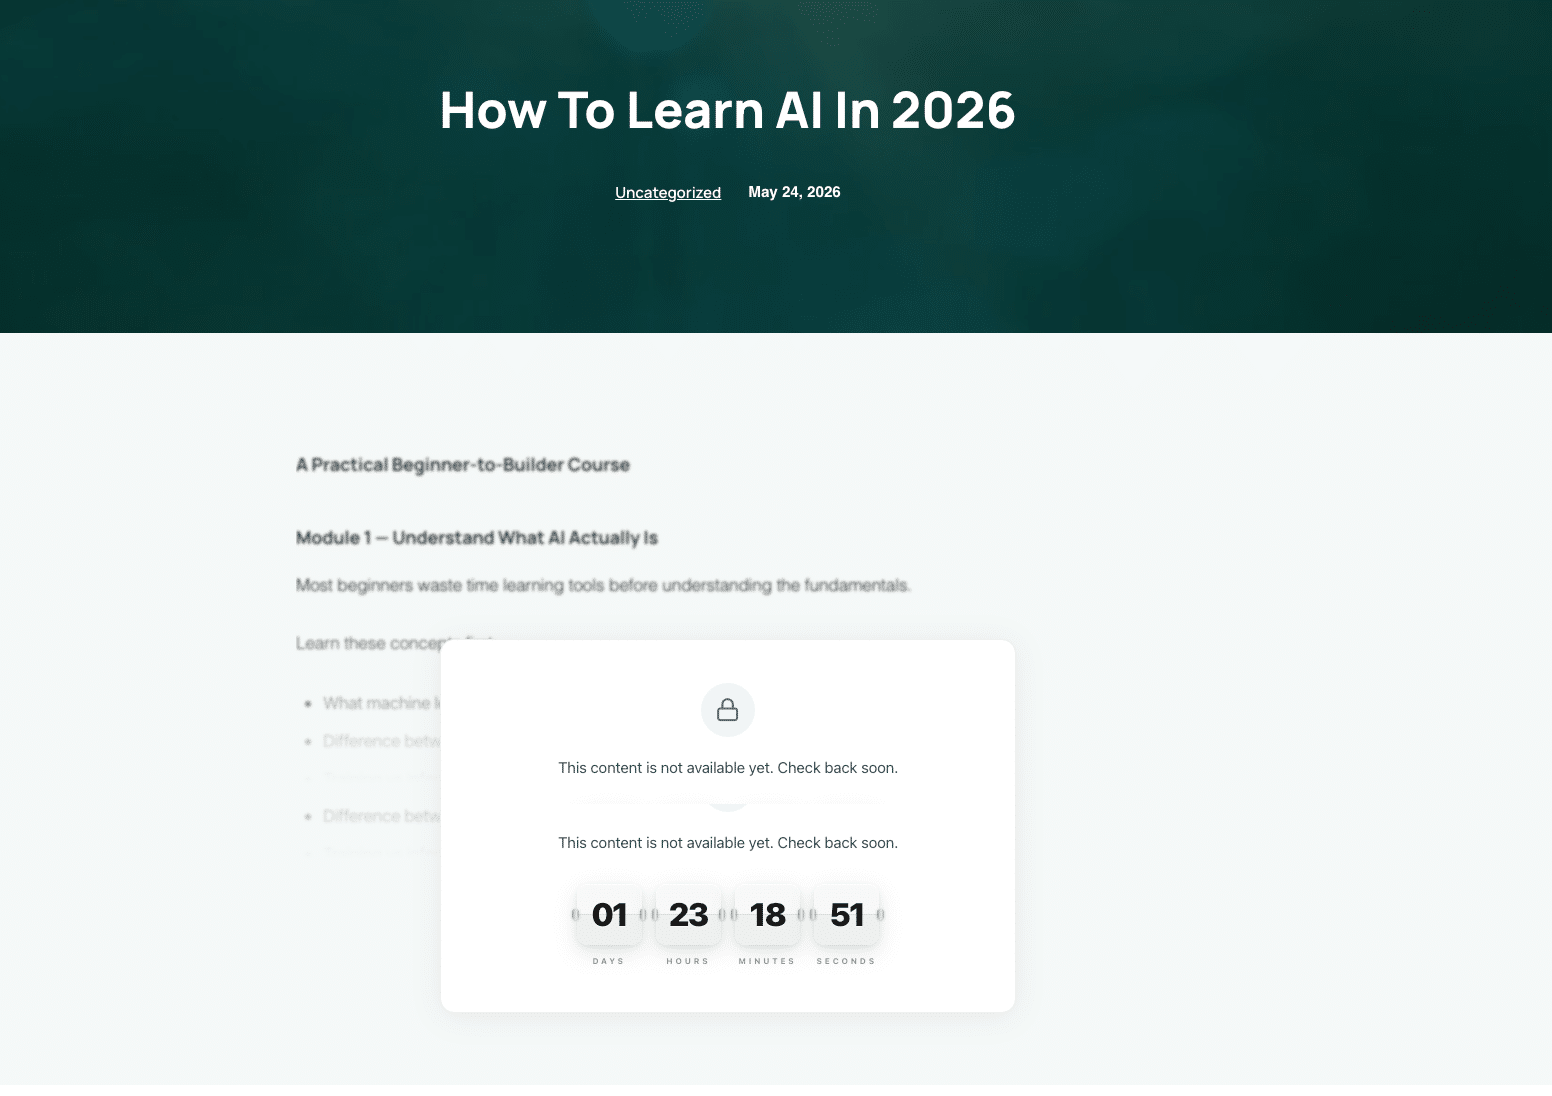
When a visitor lands on a locked post, the plugin compares the current time against that post’s unlock date on the server. If the content is still locked, WordPress renders the locked screen in place of the post body — the real content is never sent to the browser, so it can’t be read from the page source.
The countdown itself is a small JavaScript timer running in the visitor’s browser, counting down to that same unlock timestamp. It is accurate to the second and updates without reloading the page. When it reaches zero, a refresh reveals the post: the lock is re-checked server-side on every page load, so nothing needs to be republished and no cron job needs to fire.
Unlock dates are stored against your site’s timezone, not the visitor’s. Before you set a single lock, open Settings → General and confirm the timezone is right. A site left on UTC while you work in Kathmandu will unlock content 5 hours 45 minutes earlier than you meant it to — which usually shows up as students getting Monday’s lesson on Sunday evening.
Visitors in other countries still see a correct countdown. The timer counts down to a fixed moment in time, so someone in Berlin and someone in Sydney see different numbers on the clock and the content opens for both at the same instant.
Go to Tools → Timed Content Locker → Global Settings and find the Countdown Timer section. Toggle Show countdown timer on locked content on. That switches the timer on for every locked post that uses the global settings — which, unless you say otherwise, is all of them.
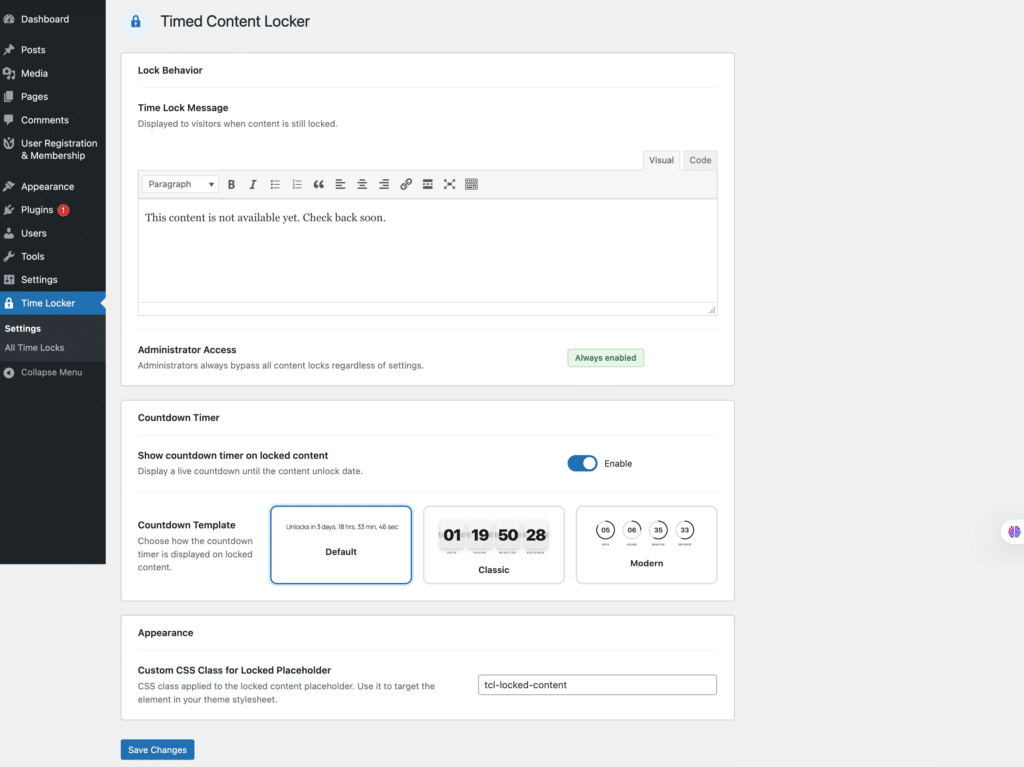
To change the behaviour for one post only, open that post, find the Time Lock Content panel in the block editor sidebar, and enable Override Global Settings. You get a per-post countdown toggle and template selector, which is what you want when a launch page needs a dramatic timer but your course lessons should stay quiet.
Administrators always see the full content regardless of the lock, so you can keep editing a locked post without fighting your own settings. To preview what a student sees, open the post in a logged-out private window.
Timed Content Locker ships with three countdown styles. They show the same information; they set very different tones.
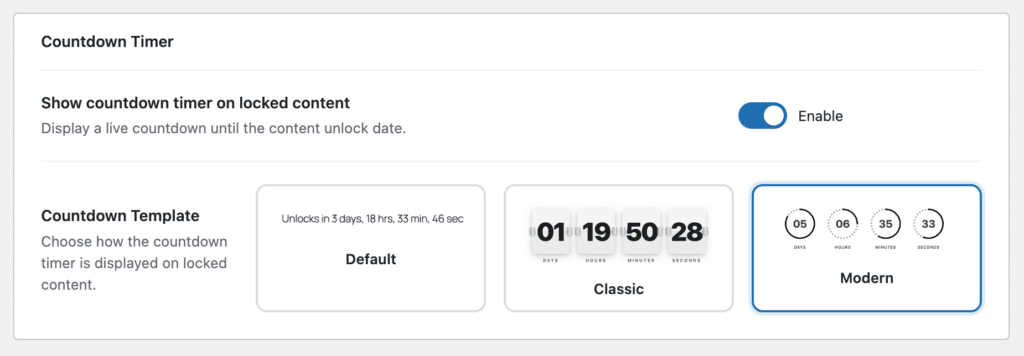
A single line: “Unlocks in 3 days, 14 hours.” It inherits your theme’s typography and disappears into the page. Use it when the lock is a normal part of the experience rather than a moment — ongoing course lessons, member onboarding, anything a student will meet dozens of times.
Large numbered tiles for days, hours, minutes and seconds that flip as each unit changes. It is the most visually loud of the three, and that is the point. Use it for launch countdowns, early-access reveals and advent calendars, where urgency is the message.
Four animated rings showing the remaining time as a proportion. It reads as polished rather than urgent, and it holds up well on dark backgrounds. Use it when the locked screen is a piece of brand real estate you would be happy to screenshot.
The timer answers “when”. Your message has to answer “why”. A countdown with no context reads as a technical obstacle; a countdown with one sentence of framing reads as a designed experience.
Set the default in Global Settings → Time Lock Message, then override it per post wherever a specific line will land better:
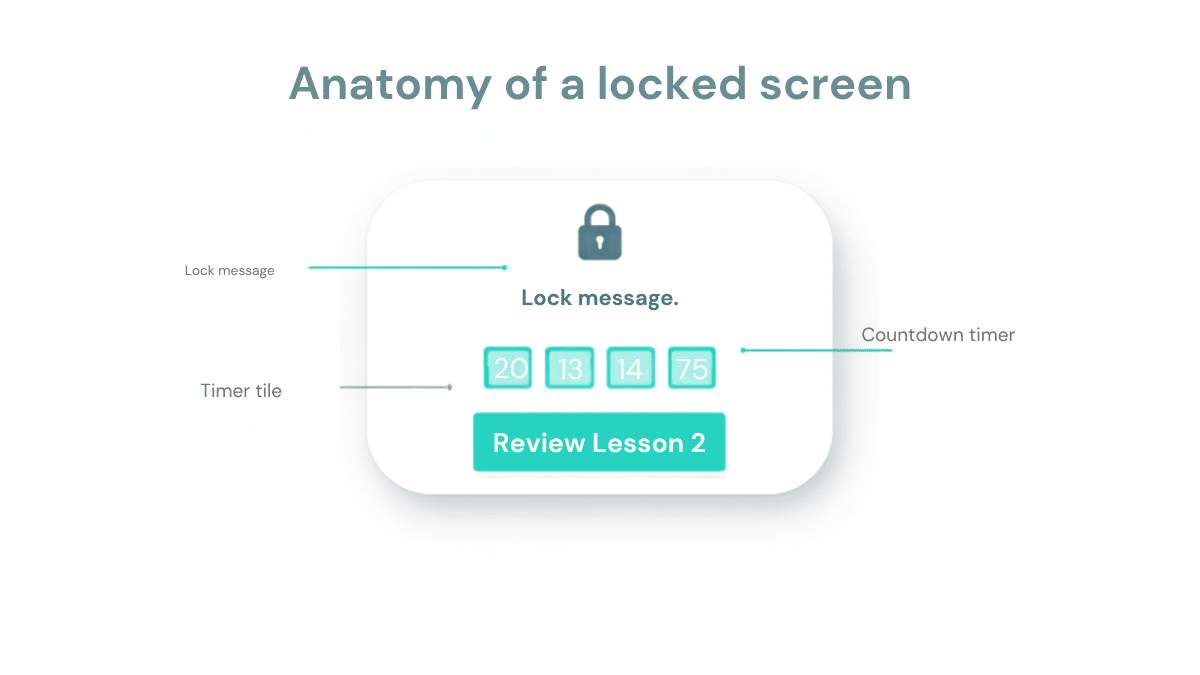
The locked screen is not wasted space. Open any post, go to the Time Lock Content panel, enable Override Global Settings, and scroll to the Call-to-Action Button section. Give it a label and a URL and it appears below the countdown.
It is optional, and it is the single change that does the most work. A countdown tells someone when to come back; a button gives them something to do in the meantime. Point it at:

The timer reaches zero on its own, but the page needs a refresh to show the content. The lock is checked server-side on every page load, so a refresh — or the visitor’s next visit — is all it takes.
Yes. The countdown targets one absolute moment, so everyone’s clock runs down to the same instant no matter where they are.
Not inherently — the title, meta description and URL stay indexable while the body is gated, and the full content is indexed once it unlocks. We covered the details in Does locking WordPress content affect SEO?
Yes. Enable Override Global Settings on any post and pick its own template, message and CTA. Everything else keeps inheriting the global defaults.
It does. In that mode the unlock moment is calculated from each user’s own registration date, and the countdown runs to that personal deadline — so two students who joined a month apart see different numbers on the same page.
A student who sees a countdown knows when to come back. A student who also sees a call-to-action has something useful to do right now. Together they turn the locked screen from a friction point into part of the course you designed.
If you are still deciding whether a lock is even the right tool, scheduled posts and content locks solve different problems — that comparison is worth five minutes before you start. If you already know what you are building, the step-by-step drip course guide and the Timed Content Locker user guide pick up where this leaves off.
Install Timed Content Locker and set up your first countdown in under ten minutes.