
 TUTORIAL
Default WooCommerce emails look exactly like default WooCommerce emails: a coloured header, a grey table, no logo, nothing that says who sent it. They are also, by a wide margin, the highest-open-rate messages your store will ever send — because the customer is actively waiting for them.
Fixing that takes about twenty minutes and no code. Here is the whole path, and one thing to understand first about where these emails come from.
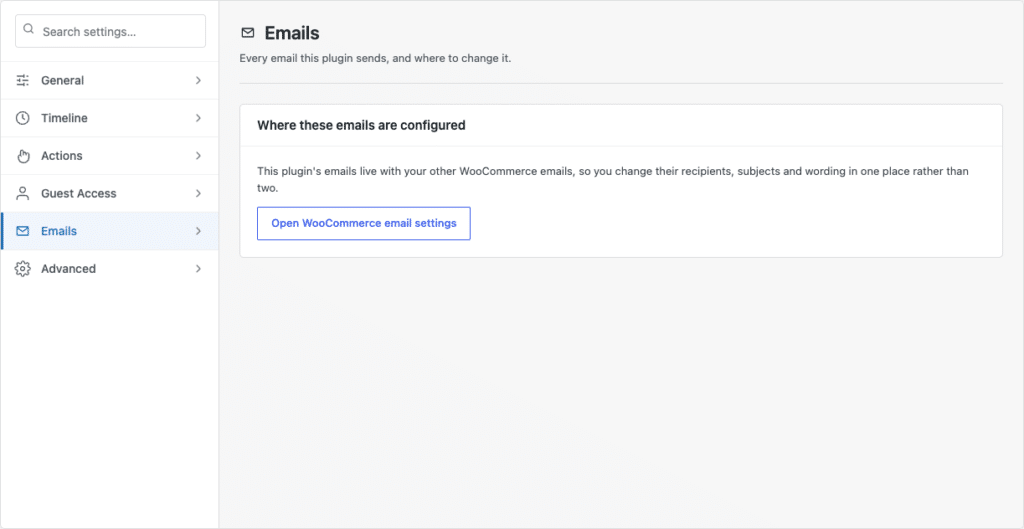
Worth knowing before you go looking for a template editor. Post-Purchase Hub does not fork your emails or add a parallel notification system. Its Emails tab exists to tell you that and send you to the right screen — the card is headed “Where these emails are configured”, and the only control on it is a button labelled Open WooCommerce email settings.
This is a good thing twice over. Anything you style once applies to every transactional email your store sends, not just the post-purchase ones. And if you ever remove the plugin, your email branding stays exactly where it was.
Go to WooCommerce → Settings → Emails. The Email notifications section lists every transactional email your store can send, with a toggle, its content type, its recipients and a Manage button on each row.
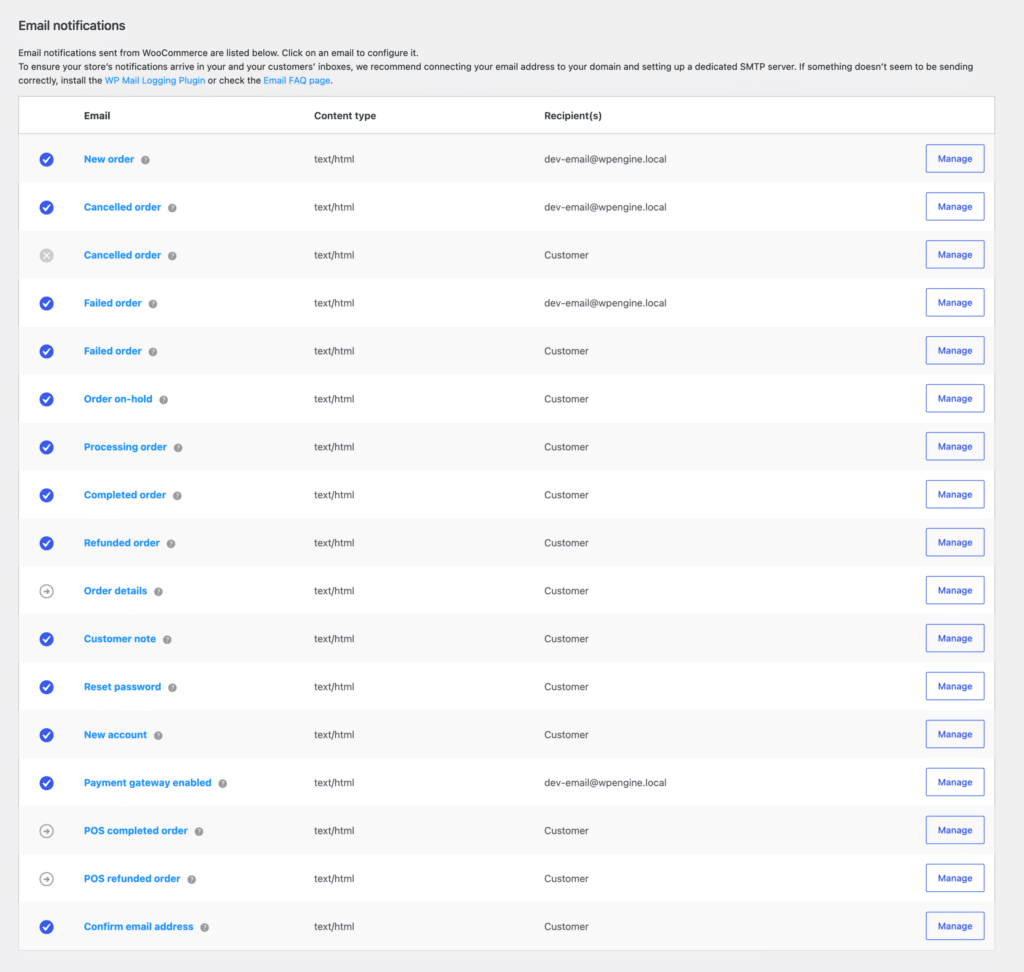
Two things are worth noticing on this screen before you touch any styling.
First, some emails are off by default, and the customer-facing Cancelled order email is often one of them. If you have switched on self-service cancellation requests, that is the message a customer gets when you approve one — leaving it disabled means approving a request silently, which produces exactly the follow-up email you were trying to avoid.
Second, there is no “shipped” email in core WooCommerce. Completed order is the closest thing, which is why its wording matters more than the default text suggests, and why a live order timeline does the work an email cannot.
The least glamorous step and the one that matters most for deliverability. Set the “From” name to your store name as customers recognise it, and the “From” address to a real, monitored address on your own domain. A no-reply address on a domain that does not match your site is the fastest route into a spam folder, and it throws away every reply a customer might have sent you. WooCommerce also recommends a dedicated SMTP setup here rather than relying on your host’s mail function.
Below the notification list is the Email template section — “Customize your WooCommerce email template and preview it below.” Recent WooCommerce versions give you:
{site_title}<br />{store_address}.Underneath sits the Color palette, with an Auto-sync with theme changes toggle that pulls colours from your active theme. Switch it off to set them by hand:
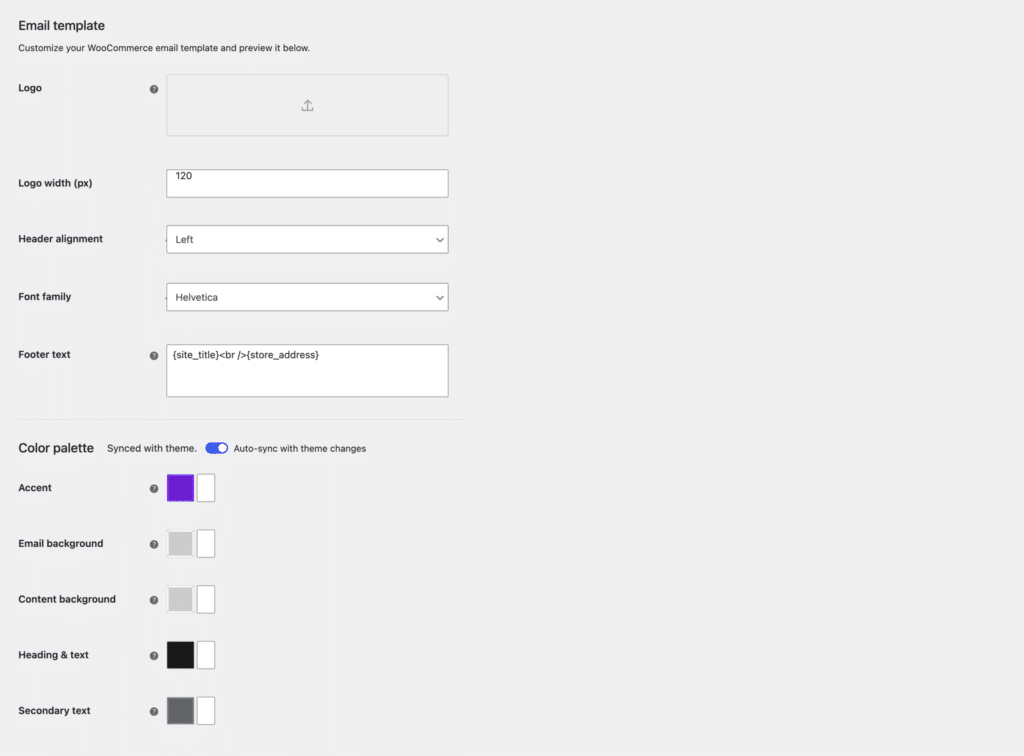
If your store is on an older WooCommerce release you will see the earlier equivalents — Header image, Base colour, Background colour, Body background colour, Body text colour. The advice is identical; only the labels moved.
Use the footer text for the things customers look for when something has gone wrong: store name, a support address, and a link to your returns policy. It appears on every email, which makes it the cheapest support deflection you will ever set up.
Open any email with Manage and you get its recipient, subject, heading and additional content. WooCommerce placeholders work in the subject and heading fields, and the list is short — it is worth knowing exactly what is available rather than guessing:
{site_title} — your site title{site_address} and {site_url} — your web address{order_date} — the date the order was placed{order_number} — the order numberThere is no customer-name placeholder in the subject line, so the common advice to open with a first name does not apply here. What does work:
The Email preview section lets you pick any template from a dropdown and view it desktop or mobile, and there is a Send a test email button that will deliver it to any address you like. Use both — the preview catches a logo that is too large or an accent colour that eats your text; the test email catches how a real client renders it.
Then do the last mile properly: place a test order on your own store, move it through each status from the admin, and read every email as it arrives. Check it on a phone as well as a desktop. Email clients are relentlessly inconsistent, and most of your customers are reading on a phone.
An email is a snapshot of one moment. The question customers actually have — where is my order right now — is better answered by a live page than by a message sent three days ago. Set up the order status timeline alongside your emails, then link to it from the footer text, so every email you have ever sent doubles as a route back to the live answer.
That combination is what actually reduces inbox volume: fewer “where is my order” emails during a busy season, because the answer is one click away from every message you have already sent.