
 TUTORIAL
WooCommerce ships with one of the least informative order screens in ecommerce: a status word, a table of line items, and nothing that tells a customer what happens next. Post-Purchase Hub replaces the status word with an Order progress list built from your own order statuses, plus a delivery estimate wherever you have given it your shipping times.
This walkthrough covers where the timeline appears, how the status-to-stage mapping actually works, how the estimate is calculated, and what to do when your theme is involved.
Two places, configured once. The single order page gets the full list. The My Account order list gains a Progress column showing the current stage and its timestamp, so a customer with several open orders sees the state of all of them without opening any.
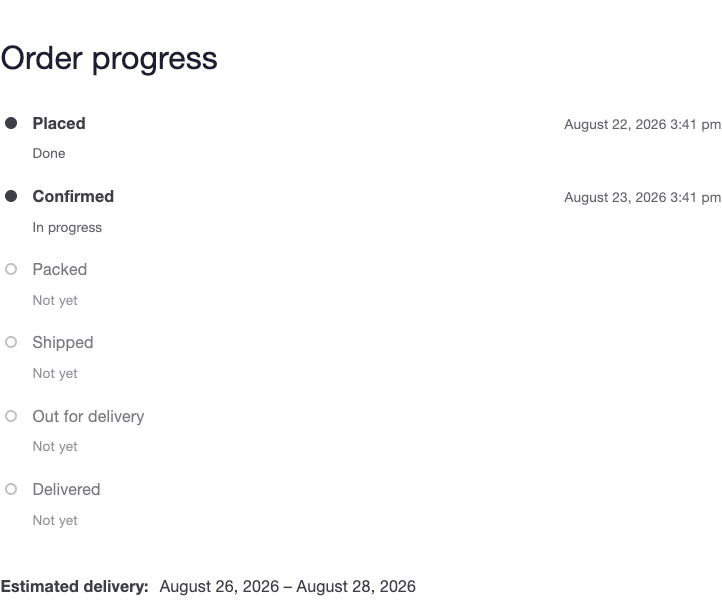
Every stage carries one of three sub-labels — Done, In progress, or Not yet — and the dates shown are real, recorded as the status changes happened rather than calculated backwards.
If you want the timeline somewhere else, the [wpmphub_orders] shortcode and the Order timeline block render it on any page; each signed-in customer sees their own orders.
This is the step that matters most and the one people rush. The stages themselves are a fixed vocabulary — Placed, Confirmed, Packed, Shipped, Out for delivery, Delivered, plus the terminal states. What you configure is the map: under Settings → Timeline → Timeline stages, every WooCommerce status your store uses gets a dropdown, and you choose which stage it lands on.
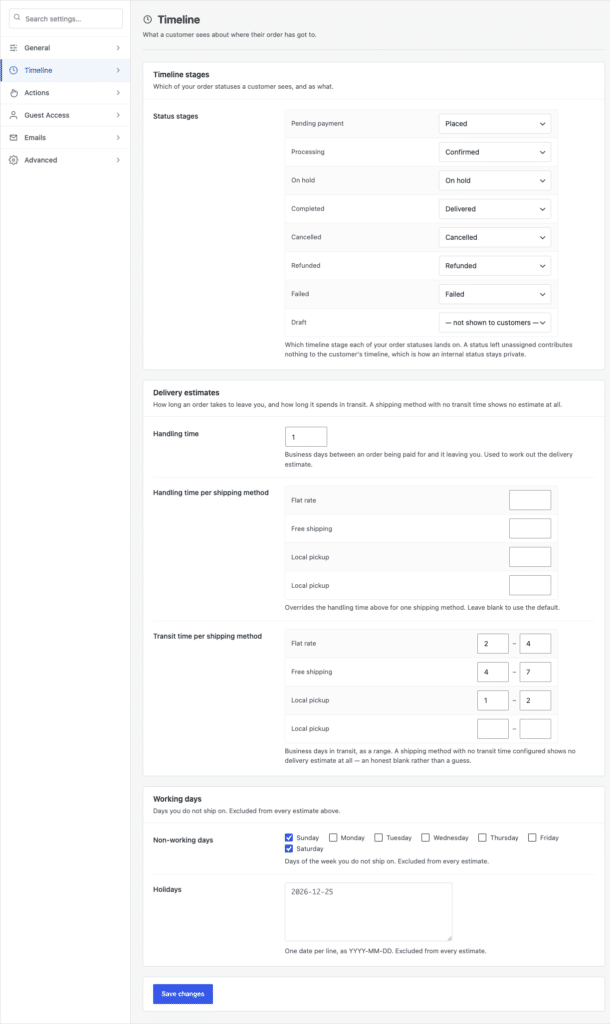
The defaults are sensible — Pending payment maps to Placed, Processing to Confirmed, Completed to Delivered. Two rules make the rest work:
What you cannot do is invent your own stage names — the customer-facing vocabulary is fixed. In practice that matters less than it sounds, because the mapping is many-to-one: three internal statuses that all mean “we have it and are working on it” can all land on Confirmed.
The estimate lives under Settings → Timeline → Delivery estimates and is built from two numbers you supply.
Both are calculated against the Working days card below them: Non-working days is a set of weekday checkboxes for the days you do not ship on, and Holidays is a plain list, one date per line as YYYY-MM-DD. Everything listed there is excluded from every estimate.
The single most common question about the timeline is why no estimate appears. Almost always the answer is the same: the shipping method used on that order has no transit time configured, and a method with no transit time shows no estimate at all — a deliberate blank rather than a guess. Set it, and the estimate appears.
If you run Advanced Shipment Tracking or WooCommerce Shipment Tracking, real tracking data steps in front of the estimate automatically as soon as a tracking number exists — and any other source can be wired in through a filter. Until then the customer sees your honest estimate rather than a fabricated tracking number, which is worth saying plainly in your order emails too.
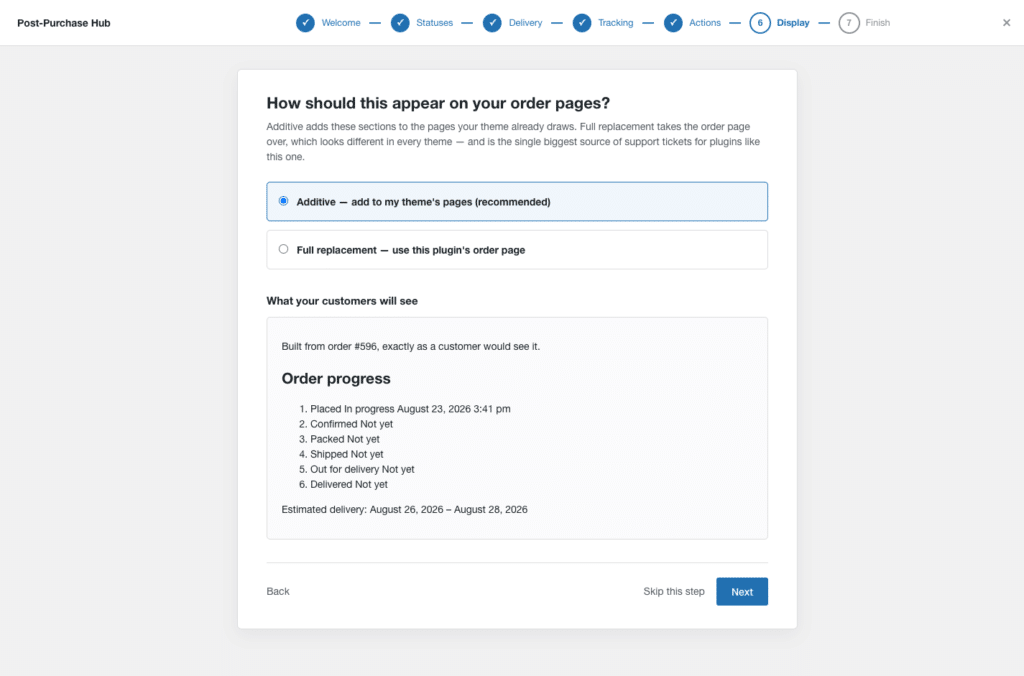
There is one placement setting, on the General tab, and it has two values:
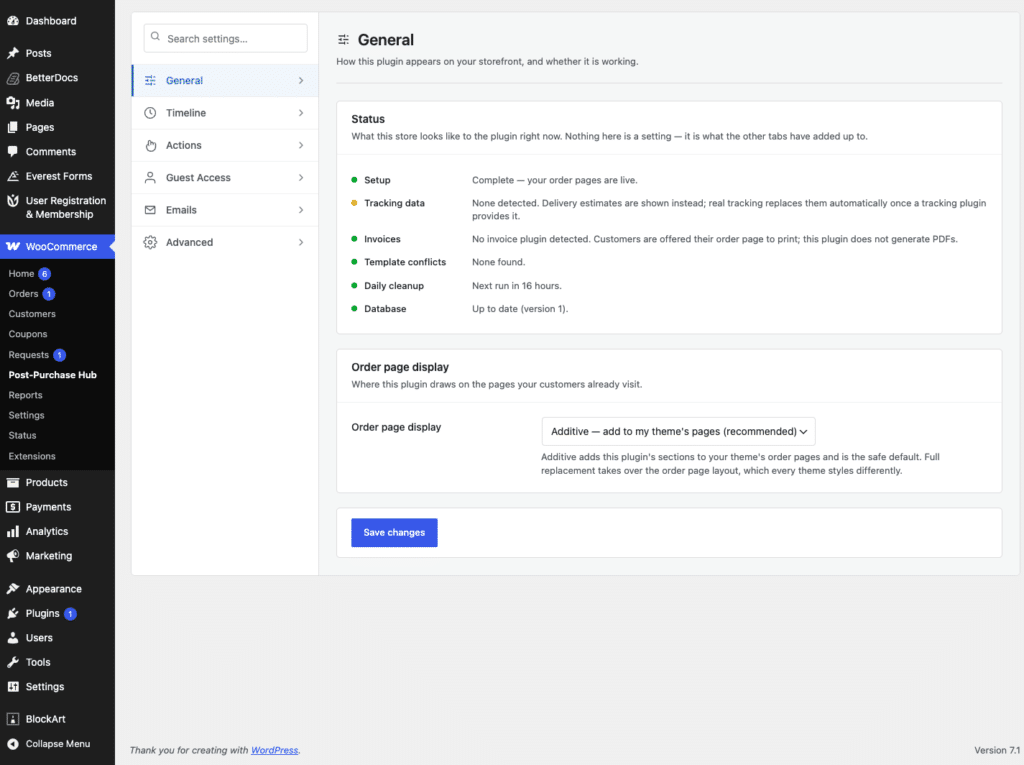
The advice here runs the opposite way to the usual instinct. If your theme heavily customises the order templates, that is a reason to stay additive, not to switch. Full replacement looks different in every theme and the plugin describes it as the single biggest source of support tickets for plugins of this kind — so it also refuses to turn on while it detects that your theme has customised those templates, rather than producing a broken page. The Template conflicts line in the Status panel is where you find out.
The wizard’s Display step asks the same question during setup, with a preview built from a real order in your store.
For finer visual adjustments, the plugin exposes filters throughout — including the stage map itself — and its markup responds to ordinary CSS in your child theme.
WooCommerce does not keep a history of status changes, so a plugin can only record them from the moment it is installed. Orders that predate the install show their stages without timestamps rather than showing invented ones. Running wp wpmphub backfill-timeline from WP-CLI fills in what can be derived from the dates WooCommerce does store.
A readable timeline is the single biggest lever on “where is my order” email volume — see cutting WISMO emails during the holiday rush for what that looks like in a busy season. Pair it with self-service cancellations and you have covered both halves of what customers actually want after checkout: visibility and control.