
 TUTORIAL
A clean install is the foundation for everything else Post-Purchase Hub does, and there is genuinely not much to it: upload, activate, walk the seven-step wizard, place one test order. The wizard itself claims about two minutes, which is roughly right if you already know your shipping times.
This guide covers the whole path from zip file to a live order timeline, with the exact screens and settings you will see along the way.
It supports both High-Performance Order Storage and legacy post storage, so you do not need to change how WooCommerce stores orders first.
Two routes, both from Plugins → Add New. Search for WPMake Post-Purchase Hub and click Install Now, or choose Upload Plugin and select the zip. WordPress handles the extraction itself — no FTP, no unzipping, no file manager.
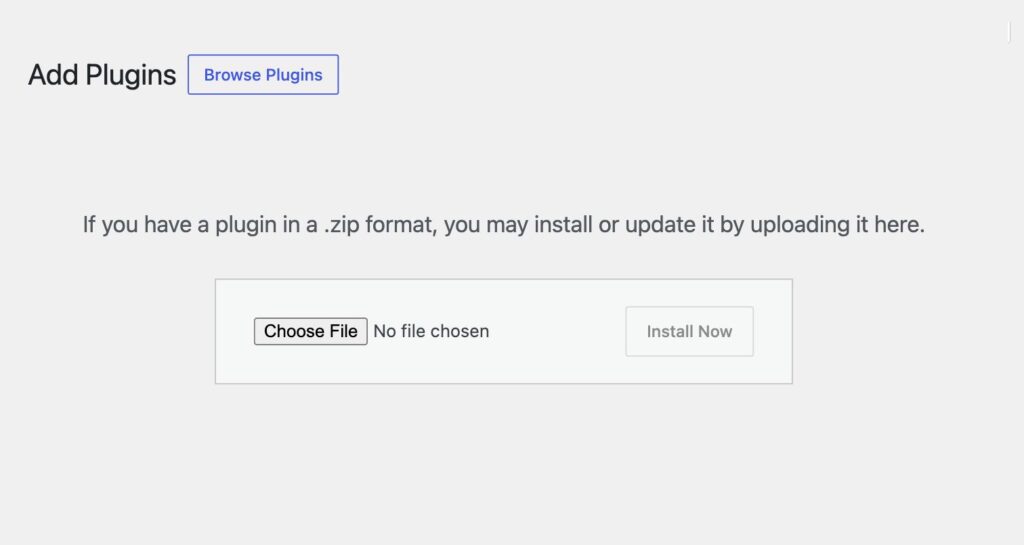
Click Activate once the install finishes. Activation on its own changes nothing on your storefront — a notice appears pointing at the setup wizard, and until you finish that wizard your customers see exactly what they saw before.
That is worth knowing if you are installing on a live store mid-morning: there is no window where the site looks half-configured.

Click Run the setup wizard from the notice, or start it from WooCommerce → Post-Purchase Hub. It opens with a question rather than a settings form, and your answer decides which of the remaining steps you are shown:
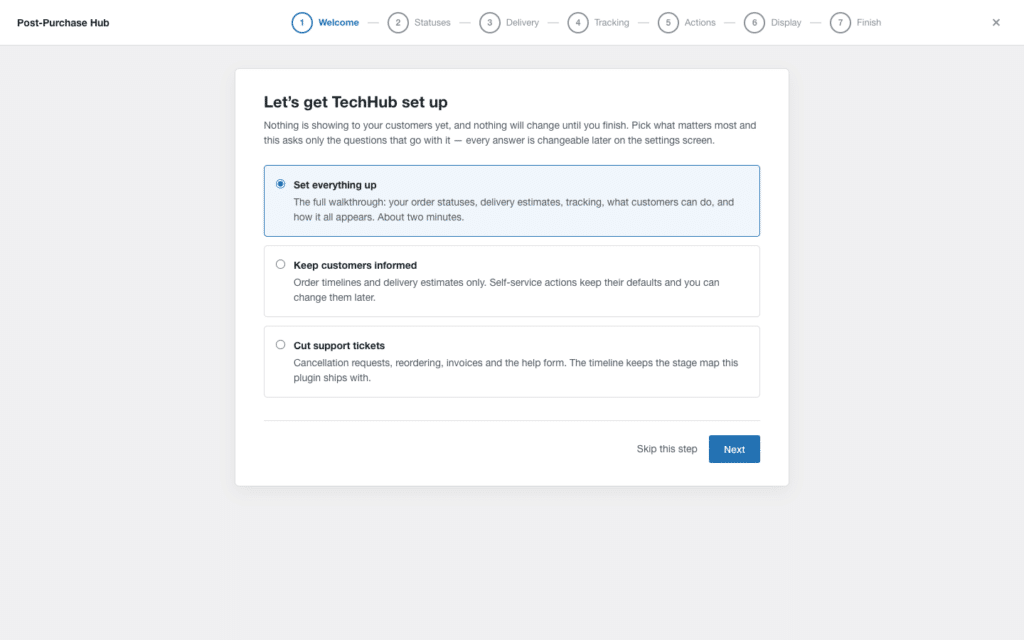
The full path runs Welcome → Statuses → Delivery → Tracking → Actions → Display → Finish. Every step has a Skip this step link, and a skipped step keeps a sensible default you can change later on the settings screen.
Two steps are worth slowing down for. Statuses is where each WooCommerce status you use — including custom ones added by other plugins — is mapped onto a stage the customer sees, and where you mark internal statuses as not shown. Delivery is where handling time and per-shipping-method transit times go; skip it and customers simply see no estimate, which is honest but not very useful. The timeline walkthrough covers both screens in detail.
The Display step is the one that decides how much of your theme is involved, and the safe answer is the default:
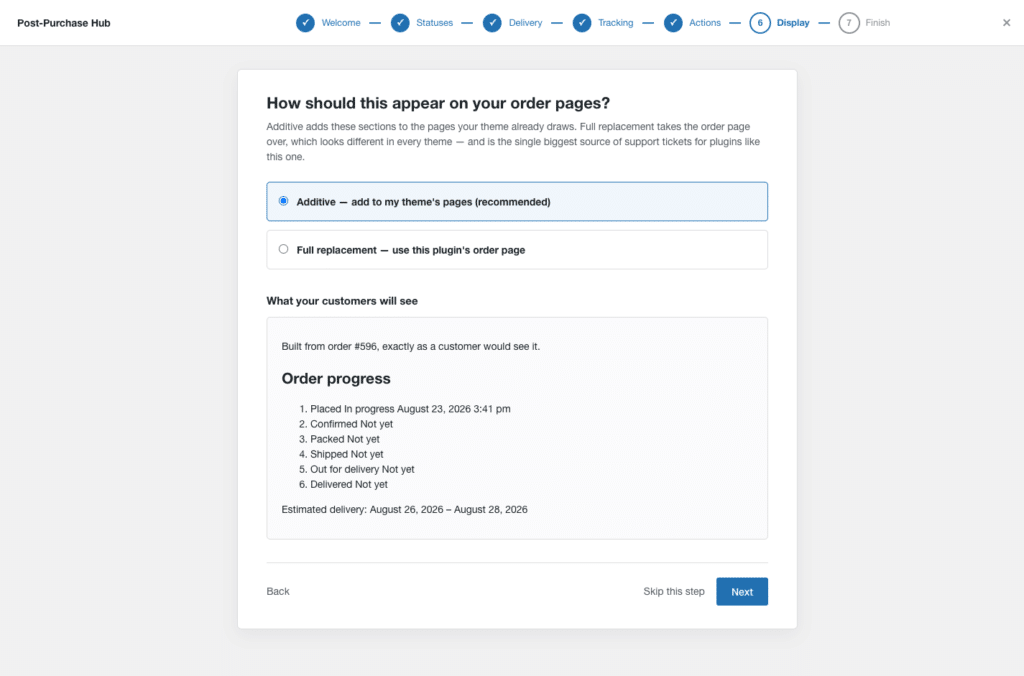
Stay additive unless you have a specific reason not to. The preview underneath is built from an actual order in your store, so what you see is what a customer would have seen.
Then press Finish and go live. That is the moment customers start seeing timelines.
Everything afterwards lives at WooCommerce → Post-Purchase Hub, with six tabs down the left and a Search settings… box that filters as you type:
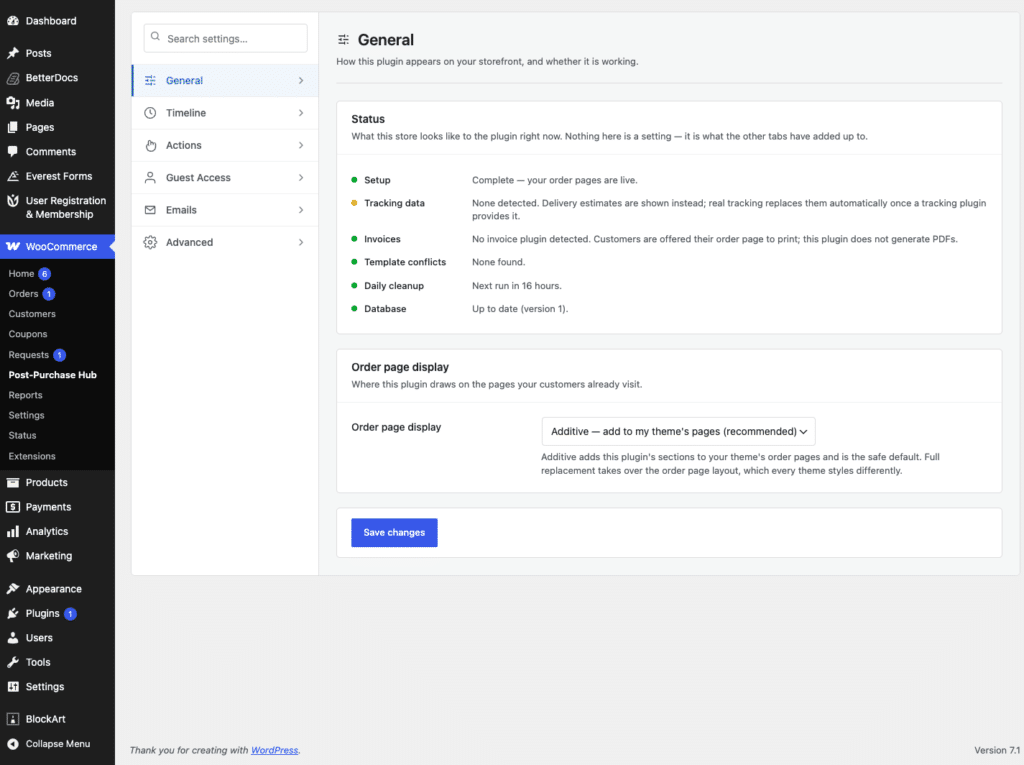
Read the Status panel before you walk away. Nothing in it is a setting — it is what the other tabs have added up to. It states whether setup is complete and your order pages are live, whether a tracking plugin was detected, whether an invoice plugin was found, whether any template conflicts exist, when the daily cleanup next runs, and whether the database is up to date.
Log in as a test customer, place a small order, and open My Account → Orders. The order table gains a Progress column showing the current stage and its timestamp, and only the actions that actually apply to each order. Open the order and you get the full Order progress list — Placed, Confirmed, Packed, Shipped, Out for delivery, Delivered — each marked Done, In progress or Not yet, with an estimated delivery range underneath.
Then move the order along a status from the admin and watch the timeline follow.
One thing that surprises people: orders placed before you installed the plugin show their stages without dates. WooCommerce does not keep a history of status changes, so the plugin can only record them from the moment it is active, and it shows an honest blank rather than an invented date. Run wp wpmphub backfill-timeline from WP-CLI to fill in what can be derived from the dates WooCommerce does store.
If a lot of your customers check out without an account, enable it under Settings → Guest Access, then put the [wpmphub_order_lookup] shortcode on a page and link it from your footer or your order emails. It is off by default, and it is built so that guessing reveals nothing: the customer enters an order number and billing email, and the signed link is emailed to the address already on the order, never to the address typed into the form. It is rate limited, with a link lifetime you control.
It is designed not to. Additive mode adds sections through WooCommerce’s own hooks and leaves your templates alone. Full replacement is opt-in, and the plugin checks first whether your theme has customised those templates — if it has, replacement stays off rather than producing a broken page.
No. Without one, customers see a delivery estimate worked out from your handling and transit times. If you do run Advanced Shipment Tracking or WooCommerce Shipment Tracking, real tracking data replaces the estimate automatically and you do not have to do anything.
Nothing is deleted unless you ask for it. Settings and request history stay in place, so reinstalling picks up where you left off. If you would rather it cleaned up after itself, switch on Delete all data when uninstalling under Settings → Advanced first — that one has no undo.
No. The plugin makes no outbound HTTP requests of any kind — no telemetry, no update pings, no remote fonts or images, no analytics.
With the install done, the two settings that change the most for customers are the timeline and the self-service actions. Start with customising the order status timeline, then set up self-service order cancellations. If you are still deciding whether any of this is worth the effort, the case for an Amazon-level post-purchase experience makes the argument in about two minutes.