
 TUTORIAL
Every cancellation that arrives by email costs you the same four minutes: read it, find the order, check whether it has shipped, reply. Post-Purchase Hub moves the front half of that onto the customer’s own order page. They submit a structured request with a reason attached; you get a queue with two buttons instead of an inbox thread.
What it does not do is cancel anything on its own, or issue a refund. Both are deliberate, and understanding why is most of what you need to set this up well.
A single cancellation by email spans three tools: the inbox, the WooCommerce order screen, and whatever you use for refunds. None of them know about each other, so you carry the context in your head between them. Do it ten times in a week and it is an afternoon.
The expensive part is not the decision — that usually takes seconds. It is the retrieval: working out which order the email refers to, checking its current status, remembering whether this customer already asked once. A request that arrives already attached to the order removes all of it.
From Plugins → Add New, install and activate the plugin, then run the setup wizard. Nothing reaches your storefront until you finish it. The full installation guide covers the requirements and all seven steps if you want the detail.

The wizard’s Actions step — later WooCommerce → Post-Purchase Hub → Actions — asks what a customer can do about an order without emailing you. There are four, each an independent toggle:
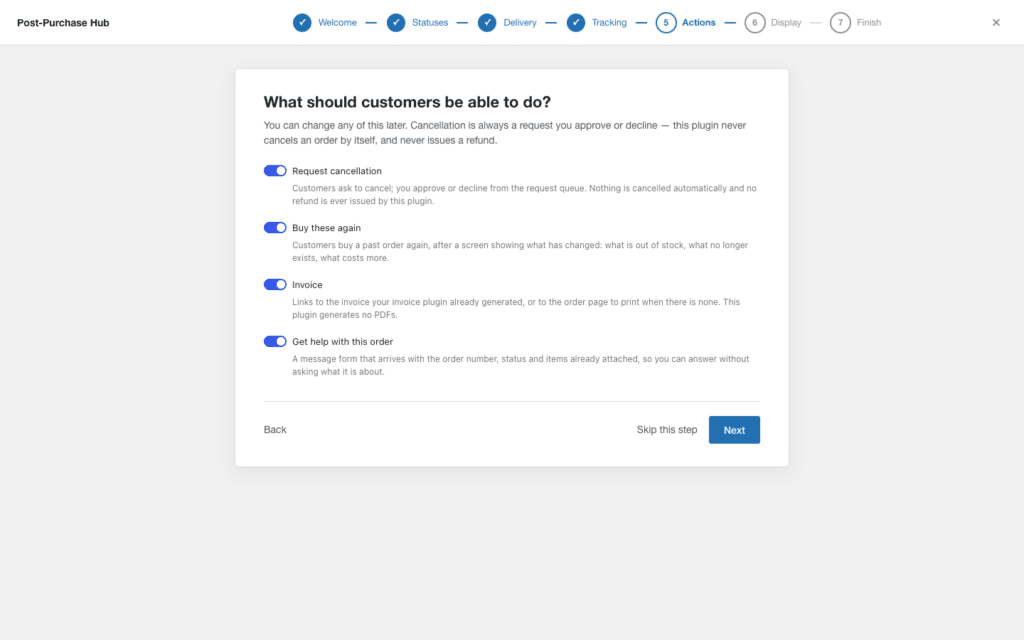
Turning an action off is not cosmetic: it is removed from the customer’s order pages and refused at the API, so a hidden button cannot be submitted anyway. Reorder and invoice are close to risk-free. Cancellation requests are the one worth configuring properly before you go live.
This is the core of the setup, and it works differently from the countdown timer most people expect. There is no “cancellable for 30 minutes” setting. Eligibility is driven by order status: Cancellable statuses is a set of checkboxes over your WooCommerce statuses, and the button disappears the moment an order leaves them.
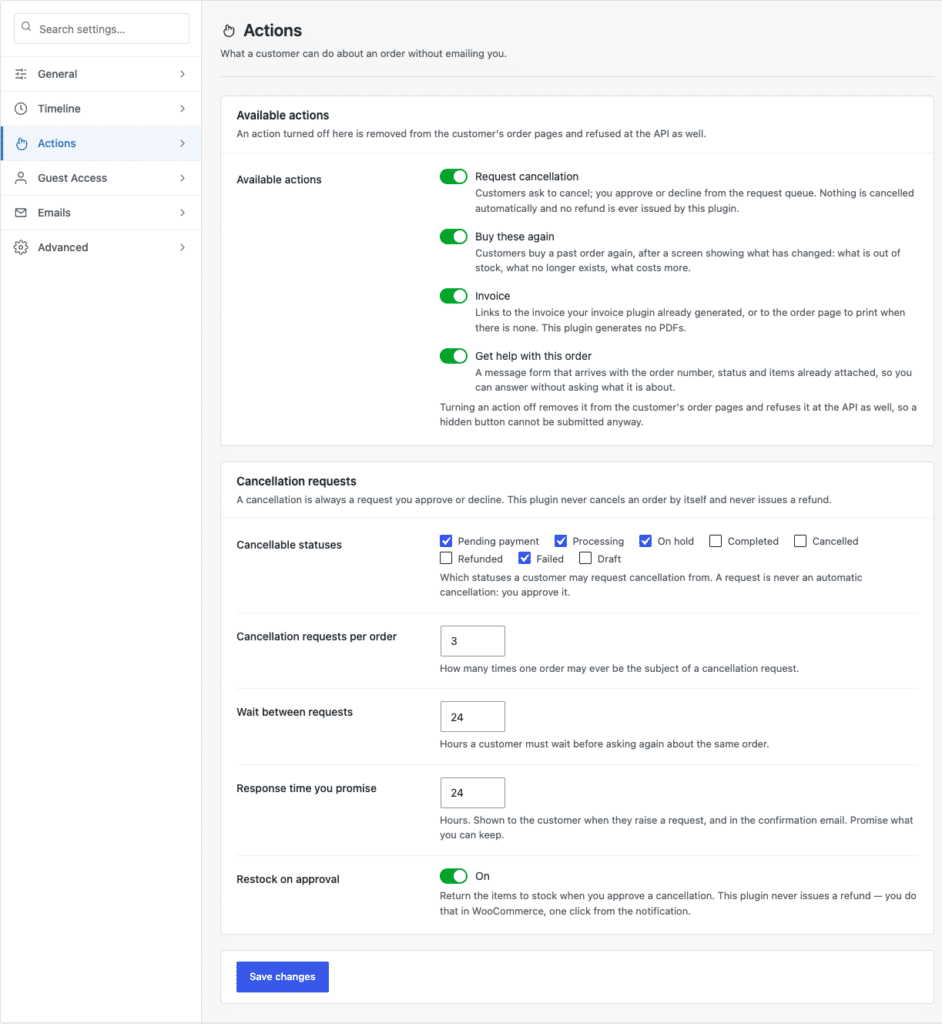
That is a better model than a timer, because it tracks reality: an order that is already packed should not be cancellable at minute eleven just because your window said thirty. In practice your effective cancellation window is however long orders sit in the statuses you ticked before your team moves them on — worth measuring before you set anything. There is more on choosing them well in setting cancellation windows that actually work.
Three supporting fields sit alongside it:
Restock on approval is the fourth. Switched on, approving a cancellation returns the items to stock. Refunds stay in WooCommerce, one click from the notification — the plugin never touches a payment gateway.
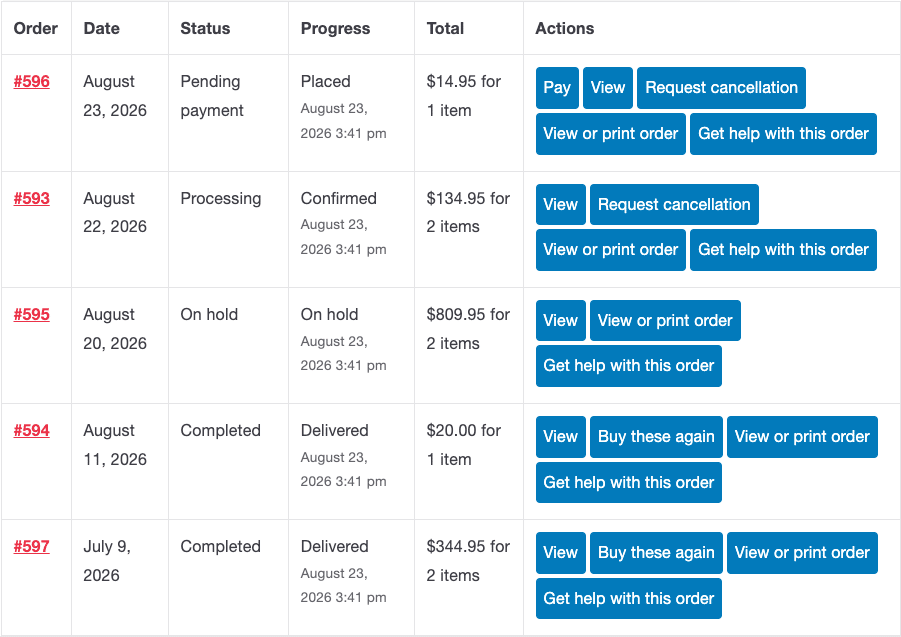
Log in with a test account, place an order, and open My Account → Orders. Alongside the new Progress column, each order shows only the actions that apply to it: Request cancellation on eligible orders, Buy these again on completed ones, View or print order and Get help with this order throughout.
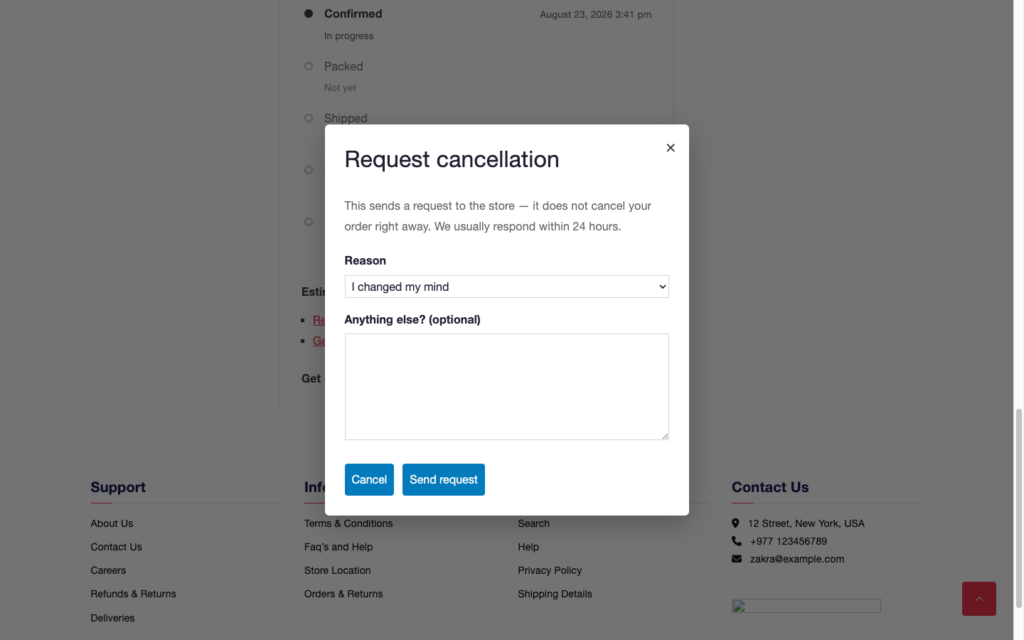
The dialog itself is doing quiet but important work. It opens with one sentence — “This sends a request to the store — it does not cancel your order right away. We usually respond within 24 hours.” — then asks for a Reason from a dropdown and offers an Anything else? (optional) box before Send request.
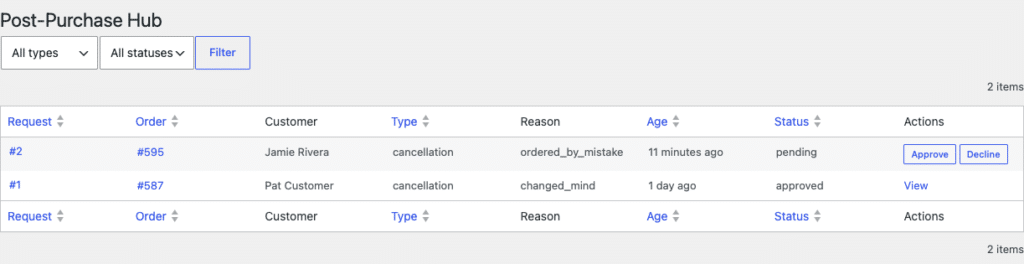
Requests land under WooCommerce → Requests, with a count in the menu of everything waiting on you. The list has All types and All statuses filters and sortable columns for request, order, type, age and status — so you can pull the oldest pending cancellations to the top in one click.
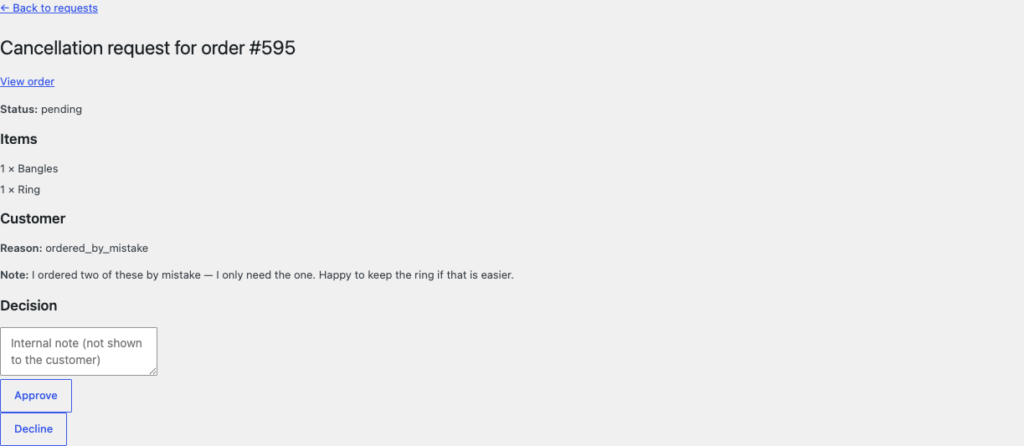
Open one and you get the order, a link straight to it, the items, the customer’s chosen reason and their note, and an Internal note (not shown to the customer) box above the Approve and Decline buttons. Approving changes the order status and optionally restocks; declining leaves the order exactly as it was.
Requests also appear on the WooCommerce order screen itself, so you are never surprised by one you did not know about.
No, and it never will. A request lands in the queue and nothing happens to the order until you approve it. If you were hoping to automate the approvals themselves, the honest answer about auto-approval is worth five minutes.
No. Approving a cancellation changes the order status and optionally returns items to stock. The refund is done in WooCommerce, on the order, one click from the notification.
The button hides itself, correctly, when the order is not in a cancellable status, when a request is already pending on it, when the order has hit its per-order limit or is inside the waiting period, or when you have switched the action off.
Cancellation requests are one half of the picture; visibility is the other. Pair this with a customised order status timeline so customers can see where an order stands before they think about cancelling at all. If you are heading into a flash sale or run a subscription box, both have wrinkles worth reading first.