
Install and activate #
- Go to Plugins → Add New and search for Content Time Lock, or upload the zip under Plugins → Add New → Upload Plugin.
- Click Install Now, then Activate.
The plugin needs WordPress 5.5 or newer and PHP 7.4 or newer. There is no setup wizard and no database step — a Time Locker item appears in the admin menu and you can start locking straight away.
Lock a page #
- Open the page you want to hold back in the editor.
- Click Meta Boxes at the bottom of the editor to open the panel drawer, and find Time Lock Content.
- Switch on Enable Time Lock. The rest of the fields appear.
- Under Restrict Access To, choose who should be held back — see Choosing who is restricted if you are not sure.
- Leave Lock Mode on Unlock on specific date and set the Unlock Date & Time.
- Click Update.
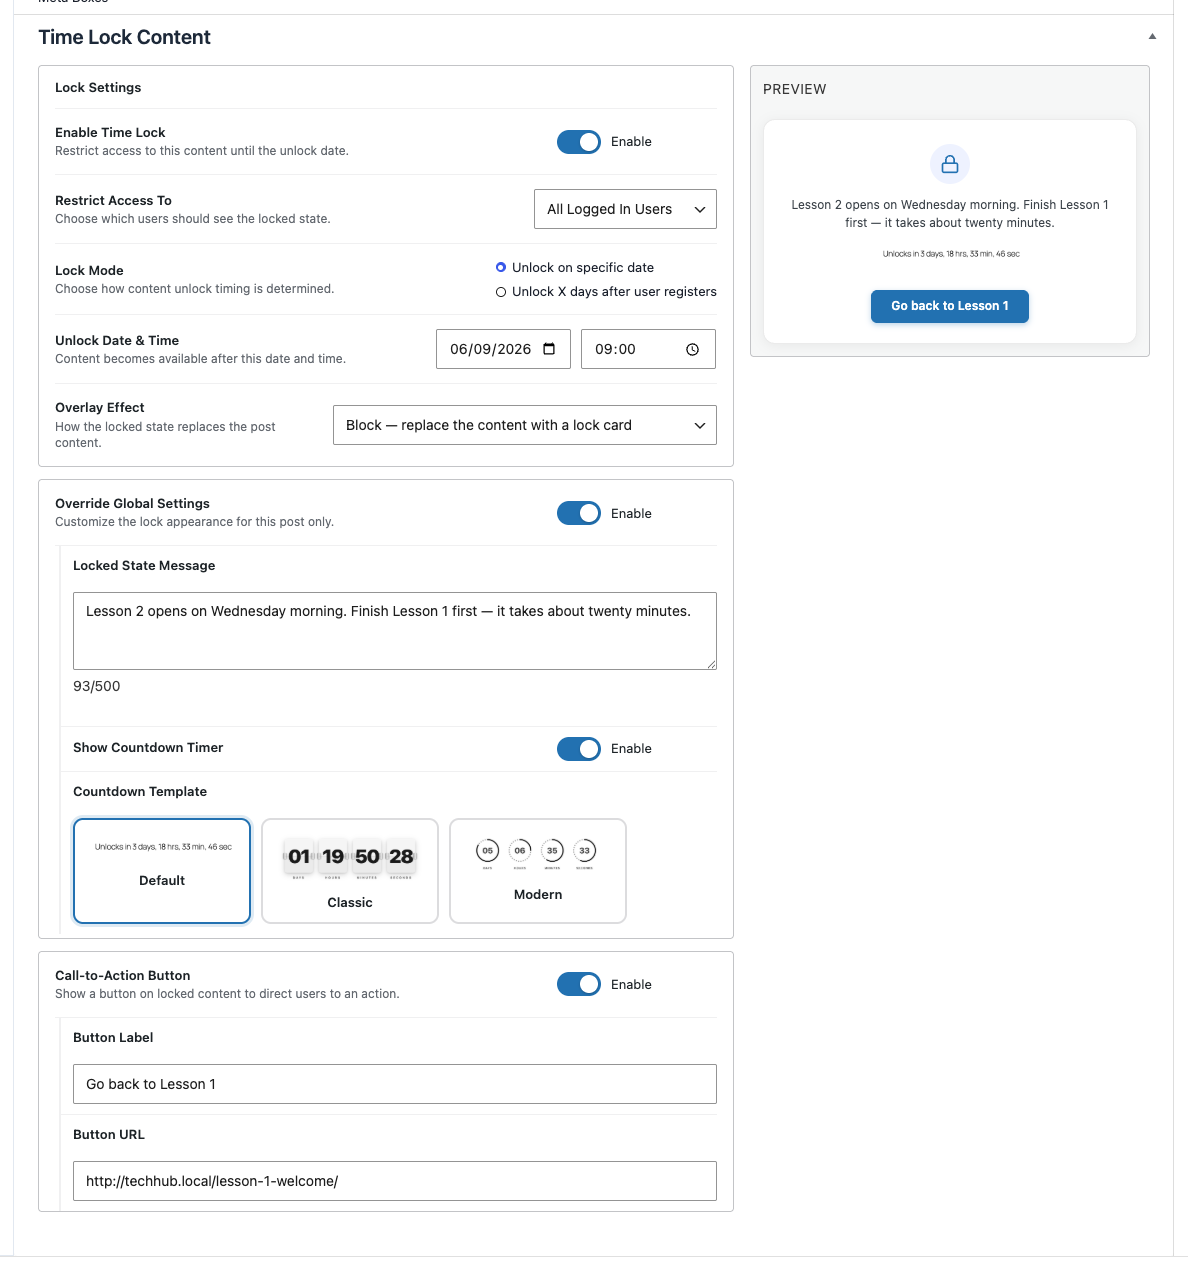
That is the lock live. The content stays hidden from the people you named until the date and time you set, in your site’s own timezone (Settings → General if you need to check it).
Check it looks right #
Anyone who can edit the page — you included — always sees the real content, so opening it in your own browser will not show you the lock. Two ways to see what visitors see:
- The Preview panel beside the settings, which renders the card as you configure it.
- A private browsing window, or a test account with the role you restricted.
If you enable the lock and leave the unlock date empty, the content stays hidden indefinitely. Always set a date before you publish something people are waiting for.
Locking your first page


